How to Host an Exabytes Domain with SeekaHost on the SeekaPanel

By James Flarakos | September 17, 2021
Table of Contents
Hosting Exabytes domains are made quick and easy with SeekaHost. Follow our simple tutorial to get your domain hosted within minutes.
Using your domain registered with Exabytes your able to easy host it wiht SeekaHost and use some of the free features we include in our hosting that others dont.
This included a free SSL certificate for every site you hold with us, a free Business email, Google and Clicky analytics and much more to help you build your website or blog.
Why Host Your Exabytes Domain with SeekaHost?
We are the number 1 provider for WordPress hosting, PBN blog hosting and domains. Not only do we provide a number of free features such as Free SSL Certificates for all sites and Free Business Emails for every WordPress site, we also provide easy Google and Clicky analytics integration straight to your SeekaHost portal.
Our Website management tool allows you to manage all your domains, analytics and websites in one easy place. Meaning you can keep up with your your analytics in one place.
Benefits of Hosting Your Exabytes Domain With SeekaHost
Along with the benefits stated above we also offer excellent customer support for your WordPress hosting. We want all our customers to get the absolute best out of their websites.
In the SeekaHost portal you will find a huge number of tutorials covering almost any subject you might need help with. You also get access to the PBN Demystified Knowledge base, which is a great resource for anyone building a Private Blog Network.
How to Host an Exabytes Domain with SeekaHost
Before getting started we suggest making your SeekaHost account first for free, you can then choose your hosting package after checking out our management dashboard.
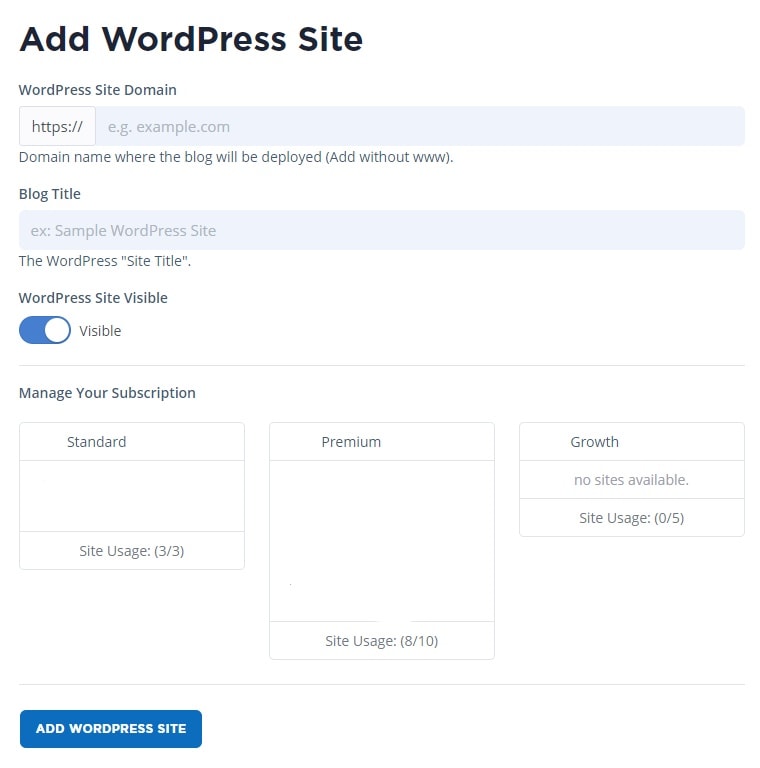
- Log into your SeekaHost portal and Select “WordPress Sites“.

- Then select the “Add WordPress Site” Option.

- Now fill in your Domain and Blog title in the relevant sections. Finally select a package and click “Add WordPress Site“
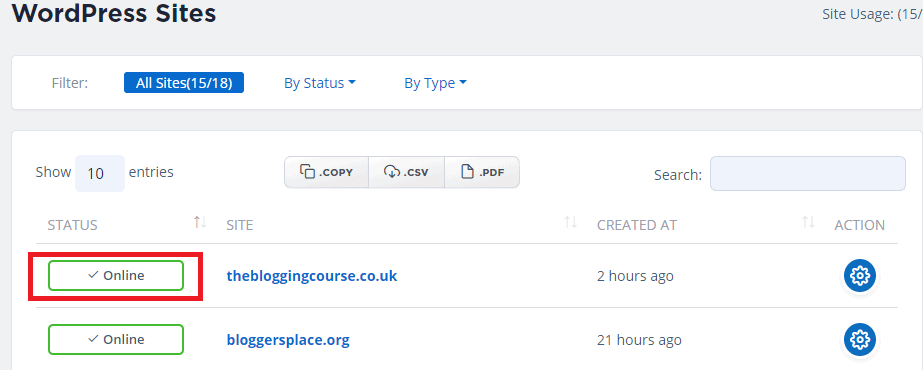
- You will be taken to the WordPress Sites List and wait untill it says “Online” next to your domain.
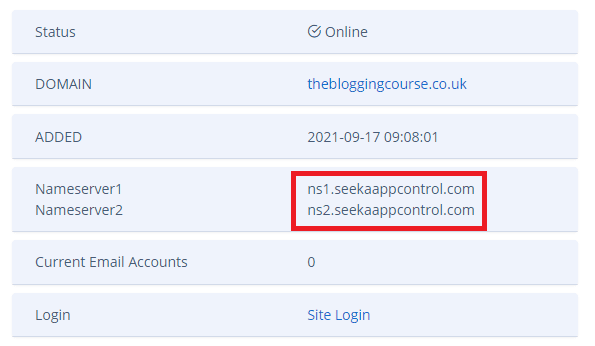
- Once Online, select the blue “Action” button on the right of your domain. Here you will find your Nameservers.
- Log in to your Exabytes Client Area and for your domain.
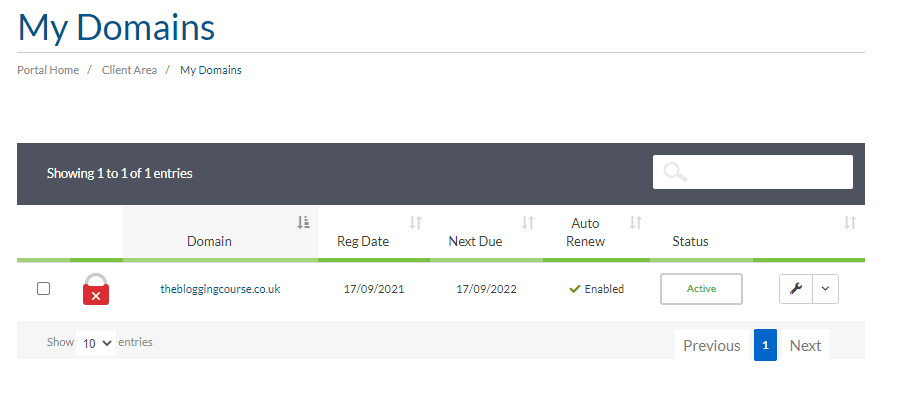
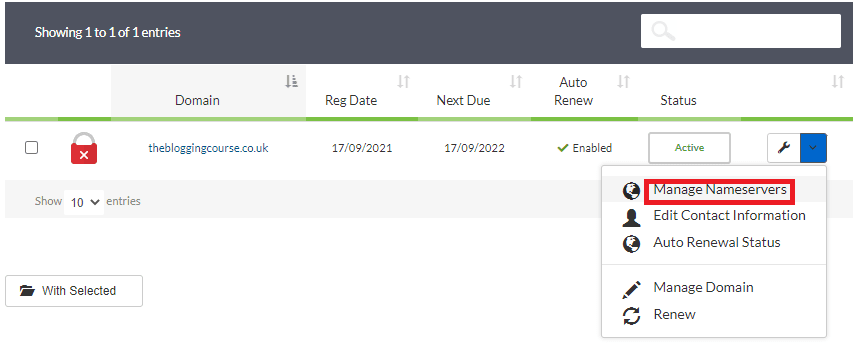
- Using the arrow dropdown menu next to the spanner icon, select the “Manage Nameservers” option.
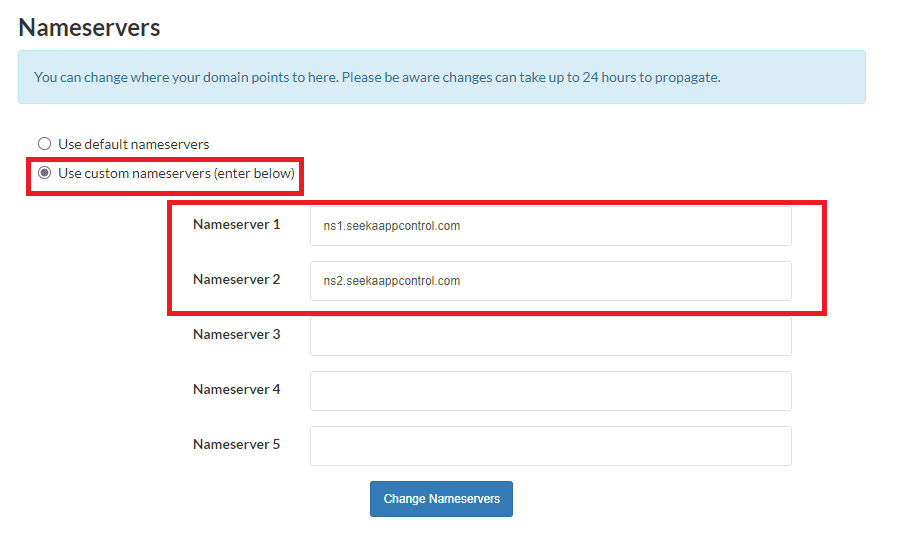
- Select “Use Custom Nameservers” and enter in your Nameservers 1 and 2 provided by SeekaHost in to the relevant sections. Once filled out click on “Change Nameservers“.
- You can now return back to the SeekaHost portal. Use the Leafdns.com option to check that the nameservers have changed over.

- Check that the nameservers you changed them to are showing. If they arent, wait a bit longer and check again or make sure you copied them over correctly with out spelling mistakes.

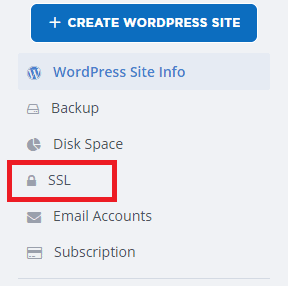
- You are now able to activate your SSL certificate for your WordPress site and login. Just be aware that the username and password will disappear from the main page once SSL is activated. If you didnt take note of it just check your email that you registered your account with on SeekaHost.
Conclusion
Hosting your Exabytes Domain here with SeekaHost is extremely easy. You can then login and start editing your Website straight away. For more tutorials on building your WordPress site, add plugins, create forums or anything else visit out YouTube channel.


